Water Damage
Disaster Restoration

How to Prevent Water Damage

Water Damage Los Angeles can be caused by natural disasters, heavy rainfall, or flooding, as well as by plumbing issues and broken appliances. It can be very costly and is rarely covered by homeowner’s insurance policies (a separate flood policy may be needed).Water Damage

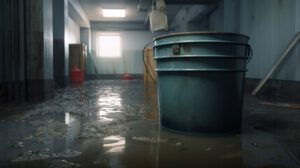
Look for signs of moisture damage such as a musty smell, mold growth, or damp spots on walls and ceilings. Regularly check appliance hoses that lead to your washing machine and refrigerator for leaks.

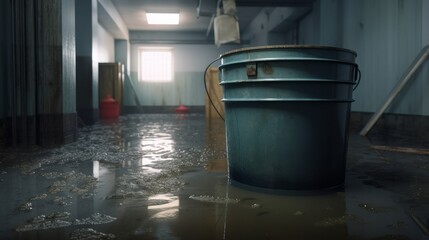
Water is essential for life, but it can also cause some serious damage. In many cases, water damage is caused by leaks or faulty appliances. If these issues are not addressed promptly, they can lead to costly water mitigation costs and even structural damage. To prevent these problems, you should regularly inspect your property for any potential water-related issues.

Leaking pipes are one of the most common causes of water damage. They can be caused by a variety of things, including freezing temperatures, changes in water pressure, or just age-related wear and tear. The problem is that it’s often difficult to catch a leaking pipe until it is too late. Most plumbing pipes run behind walls or in the ceiling, so unless there’s visible damage to the drywall, it can be hard to know when something is wrong.

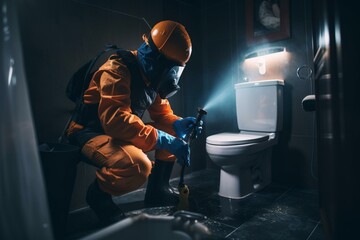
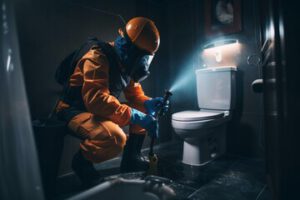
Running toilets are another major cause of leaky pipes. Not only does a constantly dripping toilet waste gallons of water, but it can also cause significant damage to surrounding surfaces. It is important to check your toilets regularly to make sure they’re in good working order.

Sewer backups are a messy and dangerous issue that can be caused by a number of factors, including blockages due to tree roots or heavy rainfall. If your sewer line becomes blocked, it can back up into your home or business and damage floors, walls, furniture, and electrical systems. This can also pose health hazards due to the contaminants in wastewater. The best way to prevent this is by having your sewer lines regularly cleaned.

Floods

Flooding occurs when an area is covered by water for a long period of time, soaking soil and destroying anything in its path. Flooding can be caused by storms, a dam or levee break and even tsunamis. Floodwaters can be contaminated with chemicals, sewage and other hazardous materials which pose a health risk to the public. They can also destroy roads, buildings and bridges. Floodwaters can have a devastating impact on communities, destroying homes and businesses and leaving people without basic services like power, gas and water. People can be injured or killed by fast moving floodwaters and should never be walked or driven across flooded areas. The loss of community spirit and economic disruption can be profound for communities affected by flooding.

Flood damage depends on many factors including the amount of water that collects, how long the area is underwater and what material a building, fixtures and fittings are made from. Buildings are not designed to withstand the constant pressure of flood water, which can cause them to collapse or rip away. Flood waters can also be very acidic, which can erode soil around the foundation of buildings and cause serious problems with walls, ceilings, floors and plumbing.

Floods are most commonly caused by heavy rain, ocean waves, rapidly melting snow, dam or levee failure and tsunamis. Human activities such as draining wetlands, building paved surfaces and clearing vegetation that naturally absorbs rainfall contribute to flood risks. Floods can occur in rivers and streams, lakes and natural ponds as well as on farmland. The most common time for river flooding is in early spring when the rapid thaw of winter snow and ice causes rivers to rise and flood surrounding land.

Storms

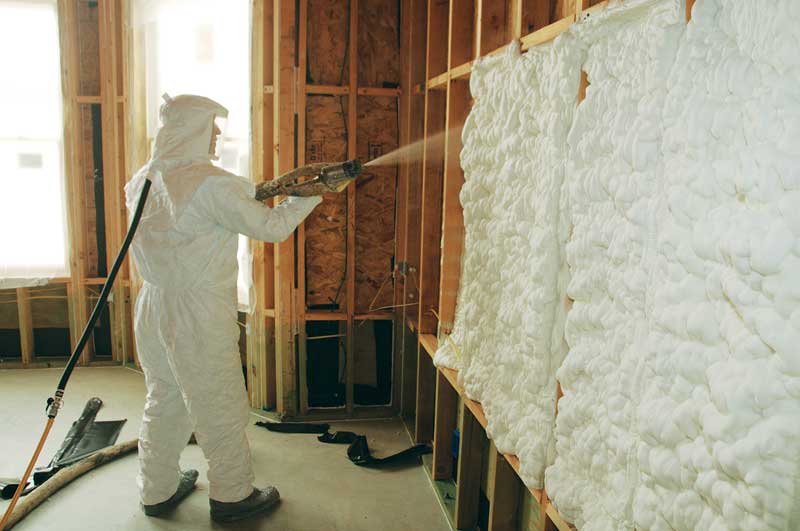
Storms are the harbingers of all sorts of havoc, bringing with them damaging winds, rain and flooding. From hurricanes to tornadoes, these weather systems can wreak destruction across the land. In addition to devastating property damage, they can also pose health hazards. If a building is exposed to water, it can cause mold, bacteria and other dangerous substances to grow inside the structure. These harmful organisms can create a host of problems, including respiratory problems, skin irritation, fatigue and headaches.

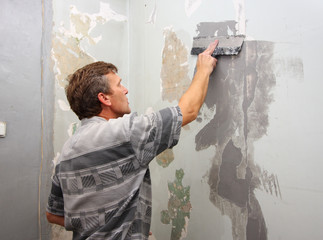
Water damage caused by storms can occur from flooding, tidal surges, rainwater or other precipitation. Flooding can destroy furnishings, furniture and personal belongings, as well as wreak havoc on flooring and walls. If left untreated, water damage can lead to the development of mold, as well as severe and irreversible structural damages. If you suspect that your home has sustained water damage from a recent storm, it is important to hire an experienced restoration company as soon as possible. They can inspect the roof and siding, foundation, basement and any other areas that may have been affected.

When inspecting for storm damage, it is a good idea to look for signs of water damage, such as discoloration or odors. If the home appears damp or has unexplained water stains, it is likely that there is a problem with the plumbing system or appliances. In addition, a sudden increase in the water bill may indicate that there is a leak somewhere. Water damage from a storm can be very serious, and it is important to know the signs so that you can call a professional. This will help to prevent further damage and save you money in the long run.

Appliances

Modern conveniences like your refrigerator, washing machine and water heater are wonderful, but they can also be major sources of unwelcome water damage. Even a small leak can cause major damage, ruin flooring and wood surfaces, and increase the risk of mold and mildew. In many cases, this is due to aging materials and leaky hoses or connections. Inspecting appliances regularly is a good idea, especially in kitchens and laundry rooms.

Leaky appliances may also cause other problems, including:

Corrosion: Water can contain impurities that can corrode metal parts inside of appliances. This can reduce their functionality and eventually lead to a complete failure.

Circuit Boards: Many appliances have intricate circuit boards that can be damaged by water damage. This can create a fire hazard and lead to electrical failure or short circuits.

Mold and Mildew: Mold and mildew love damp environments, so if an appliance is exposed to moisture for a long time it can grow these fungi. These fungi can damage internal components and can even release allergens into the air when they are used.

Water spots: Seeing spots of white or gray on your appliances is often the first sign of water damage. These can occur on surfaces like countertops and flooring, or inside of appliances.

Water damage from appliances can be a huge problem for homeowners and property managers alike. If you are a landlord, it is important to protect your investment by following some simple preventative steps. Investing in appliances that are more resistant to flood damage is a great start. Elevating appliances on stands or platforms is also a good way to protect them. Adding a waterproof barrier around the appliances is another option.

Plumbing

Plumbing is the system that brings fresh water into homes and businesses. However, pipes can wear out or burst and cause water damage. The good news is that most plumbing leaks are preventable. It’s important to watch for cracks, bulges or stains on the ceiling or walls to identify a problem. You can also pay attention to your water bill and look for spikes. In addition, you can install water detectors to alert you to problems before they become a major issue.

Leaks are the most common causes of residential water damage. They can be caused by rust, extreme temperatures or broken pipe joints. In addition, a leaking toilet or overflowing sink can damage your floors and carpets. Fortunately, most of these issues can be prevented by keeping your water tank and drain check valves clean. It’s also a good idea to get your water supply line and pipes inspected every year.

Water seepage can cause health risks, especially for those with weak immune systems. In addition, it can interrupt daily routines and put stress on families. Water damage also requires costly repairs and can lower property value.

Water damage is pervasive in commercial and multi-family residences and can be a major challenge for facility managers. With the right solutions, buildings can minimize the impact of water damage and protect occupants’ safety and well-being. Smart water management helps to reduce costs and maximize building performance. Combined with predictive analytics, they can anticipate maintenance needs, minimizing the need for costly repair and replacement. They can also improve occupant’s wellbeing by optimizing water usage and reducing energy consumption. By taking proactive measures, facilities can avoid costly damages and maintain their reputation.

Hydro Jetting
Plumbing

Hydro Jetting For Drain Clogs and Sewer Lines

Hydro Jetting Los Angeles is a great option for your home drains that experience recurring clogs. It involves pumping high-pressure water in your household, sewer, and septic pipes.Hydro Jetting

This method is effective at removing hair, food scraps, soap scum, and even tree roots. It can also get rid of the cracks and holes that allow in debris.

Your drains and sewer lines take a beating on a daily basis. Grease, soap scum, hair, and other debris clog pipes and cause slow-moving drains, backups, and poor water pressure. While conventional tools like snaking can help break up obstructions, they are often not thorough enough to clean out the entire pipe wall. This allows residue and debris to remain on the interior of the pipes, causing future problems such as recurrent clogs or even damage to your piping.

Hydro jetting is a much more effective solution for cleaning your pipes and preventing future clogs. The pressurized stream of water scourers the inside of your pipes and removes residue, food waste, mineral scale, and other debris that can clog and slow your system down. This is especially important in older plumbing systems where there can be a buildup of hardened grease and other materials that cause recurrent blockages.

When used correctly, the high-pressure stream of water can easily and quickly dislodge most clogs. It can also clean out hard-to-reach clogs without requiring excavation or other invasive plumbing techniques that can expose your home’s piping to unnecessary risk. This process is also useful in dealing with tree roots that have grown into your sewer lines, as it can easily cut through and remove them.

Recurring clogs and blocked drains are more than just annoying – they can cause wastewater to back up into your home or business, leading to serious health and safety issues. With this in mind, Smiley Drain offers hydro jetting services to clean and restore your plumbing system so that it’s as good as new.

Prior to hydro jetting, our plumbers will inspect your piping with a camera to make sure it’s in good condition. This is important because water under such a high amount of pressure could crack or break old, fragile, or damaged piping. We’ll also want to ensure that your clogged pipe isn’t actually a collapsed or damaged section of piping, as this would require more extensive repair work.

Many homeowners and business owners opt to have hydro jetting done as a preventative maintenance measure. It’s recommended that restaurants and other establishments that use a lot of grease have their drains hydro jetted yearly or every other year to keep them free from grease, fats, oils, minerals, and other debris that can lead to blockages and downtime.

Efficiency

Hydro jetting is one of the most efficient drain cleaning methods available. It uses high-pressure water streams that scour the interior of your pipes, dislodging buildups and blockages caused by grease, soap, hair, mineral buildup, tree roots, and other debris. This powerful blast of water is more effective than traditional snakes and can quickly restore your flow. It’s also safe for your pipes and provides long-lasting results.

This method of drain cleaning is ideal for removing stubborn clogs and is a great choice for clearing out accumulated debris in storm sewer lines. It can also help prevent backflow, which occurs when dirty water reverses direction in your plumbing system and enters areas it shouldn’t.

The process involves a specialized nozzle connected to a high-pressure water hose that is used to clean and unclog drains. It produces powerful streams of water to clean out the line and can be adjusted for different PSI levels. A video inspection of the line is usually carried out before deciding on the right water pressure. This will determine if the pipe is in good condition and can withstand the power of the water.

Unlike the traditional snake, hydro jetting cleans the entire pipe. This means that it takes less time, which can save you money on labor costs. In addition, the powerful stream of water can remove bacteria and other organic growth that causes odors in your drains. It can also clear out tree roots that have penetrated the drain pipe.

Hydro jetting can also reduce the need for frequent drain cleaning, saving you money in the long run. It can eliminate the need to buy costly chemical drain cleaners, which are not good for your pipes. In fact, it can be a long time before you have to call for a hydro jetting service again.

Hydro jetting may be more expensive than other methods of drain cleaning, but it is worth the investment. It can save you from costly repairs to your plumbing system by preventing future clogs and other problems. In addition, it is a quick and effective method that can be done in less than an hour.

Safety

Unlike other methods, hydro jetting does not involve any chemical solutions or toxic substances. Instead, it uses clean water at a high pressure to wash away debris in pipes and sewer lines. This is good news for the environment and your health.

In addition to helping to remove clogs, hydro jetting also helps to clean the build-up sticking to the walls of your pipes. This can help to prevent future clogs and keep your plumbing system running smoothly for a long time.

When used by a qualified plumber, the hydro jetting process is safe for most home and commercial drains. However, it is important to note that old or damaged pipes may not be able to withstand the high water pressure. This is why a video inspection should always be conducted before a plumber performs hydro jetting. The inspection will also allow the plumber to see if the pipes are in good condition or if they need to be replaced.

Older buildings often have decades of accumulated material stuck to their sewer pipe walls. While a snake can help break up some of this debris, it does not fully clear the pipe walls. In these cases, it is usually necessary to use a more powerful cleaning method like hydro jetting.

This method can help to avoid costly excavation and restoration by cleaning out the pipe without having to dig a trench. It can also be used in situations where it is not possible to access the clogged pipes through a cleanout. This includes homes and businesses with concrete or clay sewer lines and old cast iron pipes that are prone to corrosion.

Unlike drain snakes, which can leave behind traces of chemicals and other debris in the pipes, hydro jetting is an environmentally friendly cleaning option. The high water pressure is used to clean the pipes, not to flush out the waste or deposit it elsewhere in the system. This eliminates the need for corrosive drain cleaners, which can contaminate soil, underground water, and natural vegetation.

In addition, hydro jetting does not damage the pipe wall surface, and it does not cause any rust or other discoloration. While it does require a lot of water, it is not as damaging to the environment as other drain cleaning techniques.

Environment-Friendly

Unlike other plumbing techniques that use harsh chemicals and methods, hydro jetting only uses clean water to clean pipes and drains. This makes it an environmentally friendly process.

In addition to helping keep your home free from clogs, hydro jetting can help prevent future damage to your pipe and drainage system. Many pipe problems are caused by grime build-up on the inside of the piping. Hydro jetting eliminates this grime build-up and forces it through your piping, which helps make your pipes more efficient and durable.

The process of hydro jetting also eliminates the need for plumbers to open walls or dig up your property to repair a clogged sewer line. This is especially helpful for older homes and buildings with aging infrastructure. Older plumbing is often more fragile, making it difficult to access certain parts of your drain and sewer lines with traditional unclogging techniques.

When you opt to use the hydro jetting method for your plumbing maintenance, you will be able to save money and prevent future problems with your plumbing. Clogs and backups can be extremely costly, so it is worth it to invest in this service in order to avoid future headaches. The hydro jetting process is also a great option for businesses that want to prevent expensive and time consuming problems with their drains.

Hydro jetting is the ideal solution for older building with aging plumbing infrastructure. Using this service will ensure that all the clogs and debris in your drain and sewer pipes are eliminated, so that they work properly and efficiently. It will also help to extend the life of your pipes, as they will not need to be replaced as frequently. Additionally, this service is environmentally friendly and does not require the use of any chemicals or other toxic substances, which makes it a great choice for homes and businesses located near water sources like rivers and lakes. The lack of chemicals in the hydro jetting process also makes it a safe choice for your family. This is because it does not introduce harmful bacteria into your home.

Stucco Repair
Stucco Repair

Cracks and Holes in Stucco

Stucco is a versatile and attractive siding option for homes. Its composite materials naturally deter fire, rot, mold, and termite infestations. However, moisture penetration can cause cracks and holes in stucco walls.Stucco Repair

Homeowners interested in doing a DIY stucco repair project should understand the materials, costs, and repair process. They should also know when to consult a professional like Stucco Repair Philadelphia.

If you have a stucco-covered building, it’s a good idea to keep an eye on it for cracks and other damage. Stucco, though highly weather-resistant, is not impervious to damage and needs regular maintenance to keep it in good condition. If you spot any cracks, it’s a good idea to address them as soon as possible to prevent moisture penetration and subsequent damage like wood rot, mold growth, and peeling paint.

Hairline cracks less than a quarter inch wide are relatively easy to repair. They can be filled with standard caulking. However, elastomeric caulks are better choices for this type of work since they offer higher durability and adherence to stucco.

Before you apply your chosen caulking, wet the area surrounding the crack with a hose or spray bottle. This helps ensure that the caulk won’t dry out and shrink around the crack. It will also help to ensure that the caulk adheres properly to the wall and that the crack is adequately sealed.

When the caulking is applied, let it dry before painting it. Be sure to use a paint that is compatible with stucco, such as latex or acrylic, for the best results. If you have a smooth stucco texture, reapply the caulking until it is flush with the finish to ensure that there are no noticeable “hard lines” and that the repair blends in seamlessly. If you have a rougher stucco texture, try experimenting with sanding the caulking before applying it to get a better match.

While surface cracks are relatively common, a more serious problem that should be addressed immediately is if the cracks extend through the plaster and towards the lath. In these cases, the repair process is more involved and requires more time. First, remove any broken pieces of plaster or stucco with a hammer and a cold chisel. Then, carefully widen the crack by at least a quarter inch using a cold chisel and a hammer. Be careful not to disturb any areas of existing lath if possible, and wear heavy leather gloves and a dust mask when doing this.

Holes

The appearance of holes in stucco can be a real eyesore for your home. Fortunately, they are often quite easy to repair. There are three primary reasons for them to occur: lousy stucco work: Occasionally, the company that performs the stucco work does a poor job that leads to cracking or even holes. This can be caused by the wrong mixing proportions, improper mixing, or simply bad workmanship. The contractor may also not have used the proper building methods, such as tying the drywall to the framing. Extreme Weather: Hot and cold temperatures can cause shrinkage, expansion, and contraction of the stucco. This can create stress, which can lead to cracking and the formation of holes.

The first thing you will want to do to repair a hole in your stucco is to clean it out. Using a wire brush, you should be able to scrape away any loose material that is in the hole. If it is particularly large, you may need to use a hammer and chisel to get rid of any remaining material. Once you have cleaned the area, it is important to blow out the hole in order to eliminate any debris that could negatively affect the bond of the repair materials.

Next, you will want to prepare the area for the stucco patching and finishing products that you are going to use. You will want to make sure that the hole is properly ventilated while you are working on it. You will also need to remove any loose paint and debris from the surface of the hole. Once the surface of the hole is prepared, you can apply the patching product to the area and then finish it off with a piece of fiberglass mesh.

You will then need to apply a second layer of the patching compound to the area. You will need to ensure that it is completely cured before applying the fiberglass mesh and then the final layer of stucco. When finished, you will need to sand down the patch to smooth it and blend it into the surrounding stucco.

Loose Stucco

Stucco cracks and holes can be patched, but if loose stucco is falling away from the wall, it can be more of a problem. It can allow water to seep behind the surface and cause hairline cracks or soft spots, and it can expose the underlying wood lath support to moisture, which will deteriorate over time.

If you notice an area of loose stucco, it’s important to take care of the repair right away. You may be able to catch the problem before it worsens by regularly checking for loose areas and repairing them immediately.

A professional can help you replace old traditional stucco with a synthetic product that is more resistant to cracking and requires less maintenance, but for those who don’t want to invest the money, there are several steps homeowners can follow to repair loose stucco. Start by removing the loose material. Wear gloves and eye protection while attempting to break up the stucco with a cold chisel or ballpeen hammer, being careful not to damage the underlying wooden lath. Then use a wire brush to remove any remaining residue.

Once the damaged stucco has been removed, check to make sure that the metal mesh beneath is still intact and not showing signs of rust. If necessary, cut a piece of new mesh to size using metal snips and staple it to the lath. Then spray the area with water and apply a coat of waterproof caulking to the exposed lath.

For small holes and larger cracks, mix a batch of pre-mixed stucco patch material according to the manufacturer’s directions and fill the hole with it. When it’s dry, use a mason’s trowel or putty knife to smooth the surface and apply a second coat that’s dampened. When that coat is dry, etch the surface and apply a third coat, which will be the final color of the repaired area.

Homeowners can even apply a pigment to their stucco mix to match the existing color of the walls. But it’s a labor-intensive process that requires patience and a good eye for matching colors. If you’re not comfortable tackling this type of project, a stucco contractor will be happy to handle it for you.

Preparation

Stucco is durable and an attractive addition to any home, but if your stucco is showing signs of damage, you shouldn’t ignore it. If left untreated, it can deteriorate and eventually cause moisture penetration in the wall system. Ultimately, this can lead to mold or efflorescence (a white coating that develops on masonry surfaces after prolonged exposure to water). It’s important to take a close look at your stucco and determine the root cause of the problem before attempting to fix it.

If you notice cracks or holes in your stucco, the first step is to clean the area using a wire brush. You can also use a pressure washer, but remember to set it at a low setting; too much pressure could cause the cracks to widen or break. Once you’ve cleaned the area, you should let it dry for about 24 hours.

Once the area is completely dry, you’ll need to prepare it for a new coat of stucco. If the damaged area is exposed, you’ll need to cover it with builder’s paper. For small areas, you can trim a piece of grade D building paper to the size of the patch and fasten it to the lath with roofing nails. For larger areas, you may need to cut a piece of galvanized metal mesh stucco lath that matches the original wall material. It’s important to have this in place because it will create an effective moisture barrier.

For holes, you should also place a piece of the galvanized metal mesh in the hole and then cover it with more grade D building paper. This will help prevent the rust and corrosion that can occur in the hole over time. You can use a utility knife or an exacto knife to shape the paper to fit the hole and then secure it with roofing nails.

After a layer of grade D paper has been put in place, you’ll apply a scratch coat of stucco to the surface. This should be a thin layer that’s a few inches thick. It should be lightly textured and then colored.

spray foam insulation
Insulation

Spray Foam Insulation for Drafty Houses

Spray Foam Insulation is a great way to insulate your home. It is a chemical product made up of two materials: isocyanate and polyol resin. These materials combine to form a dense, flexible substance that can expand to thirty to sixty times its liquid volume. The result is an insulator that keeps your home warm and prevents drafts.spray foam insulation

Open-cell spray foam is less expensive than closed-cell spray foam, but the downside is that the latter is denser and requires more material to cover the same area. On the other hand, closed-cell foam blocks sound waves to a much greater extent. Unfortunately, the higher cost of closed-cell spray foam means that the contractor must spend more money on materials and installation.

Closed-cell spray foam does not expand as quickly as open-cell foam, and it leaves behind interconnected closed air pockets. It’s also softer and more pliable. Open-cell foam insulation, on the other hand, has plenty of space between its cells and expands at an extremely fast rate. As a result, open-cell foam is very lightweight and breathable.

Open-cell spray foam costs between $2 and $10 per square foot. This type is typically used in wall cavities and has a lower R-value per inch than closed-cell foam. Moreover, open-cell spray foam is more durable than closed-cell foam and requires less labor for installation. However, it might require an additional vapor barrier.

The cost of closed-cell spray foam insulation can range from $1 to $2 per square foot, depending on its thickness and the number of walls. This cost is dependent on factors such as the square footage and other factors, including the cost of labor. Nonetheless, it’s easy to see that open-cell spray foam is the cheaper option.

The decision on what type of spray foam to install is an important one. There are two different types of spray foam: open-cell foam is cheaper and allows more air to circulate, while the closed-cell foam is more expensive but offers twice the R-value.

Closed-cell spray foam insulation has the advantage of being more dense and able to expand very little. This makes it ideal for the roof, where it creates a solid air barrier and can add strength to the structure. It also has excellent resistance to floodwater and damage. It can conceal any leaks in the structure.

Closed-cell foam has superior structural integrity, which is important in hurricane-prone areas. This dense material also provides an effective vapor barrier. The foam has a high R-value, which is an important consideration when insulating a building.

The density of closed-cell foam varies greatly. Open-cell foam weighs between 0.4 and 0.5 pounds per cubic foot, while the closed-cell foam is three to four times heavier. As a result, closed-cell foam can be molded to look like wood or marble.

The R-value of closed-cell spray foam is higher than that of open-cell foam. In addition, closed-cell foam is more durable and offers better resistance to air leakage and moisture. Closed-cell foam is more expensive than open-cell spray foam. It also requires professional installation.

The roof of a building has a lot of unique characteristics. Closed-cell foam can be applied to the underside of the roof sheathing or even blown into the cavity space of the roof. This makes it more effective for preventing downward heat flow.

Closed-cell spray foam insulation is less suitable for other parts of a building. This is because of the difference in density between the open and closed-cell foam.

A drafty house can be a major inconvenience, but there are ways to permanently fix this problem. The first step is to identify the areas that allow air leakage. These areas are often in the attic or basement. This is because of a stack effect, which causes heated air to rise to a higher pressure near the top of the house. This then forces cold air to enter the lower parts of the home while warmer air is forced out through the leaks.

Drafts can also come from uninsulated walls. In particular, the attic is an area that can lose a great deal of air. This leakage can cause damage to the roof. To solve this problem, you can install spray foam insulation. Besides sealing these areas, it also seals up cracks around electrical outlets and other protrusions into the home.

Another way to prevent drafts is to install an air barrier on the walls. This type of insulation is made of a compound called icynene, which is a great insulator. Since air is trapped in this substance, it cannot move around, which creates a barrier. It is important to note that even the smallest gaps in the insulation can drastically affect the house’s temperature.